
Spring OAuth2.0 구현하기
카테고리: Spring
업데이트:
OAuth 2.0이란?
OAuth 2.0은 구글, 페이스북, 깃헙, 카카오 등 다양한 기업의 로그인을 내 어플리케이션에 붙여 사용자의 정보를 가져올 수 있는 기능입니다.
이 기능을 사용하는 이유는 직접 구연해야하는 경우 구현해야 하는 기능도 많고 보안또한 신경써야 하기 때문입니다.
1. 구글 서비스 등록하기
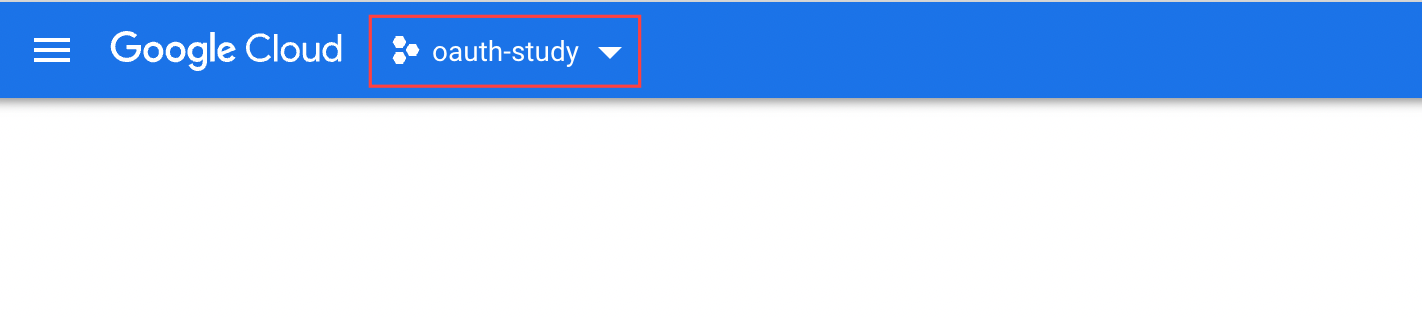
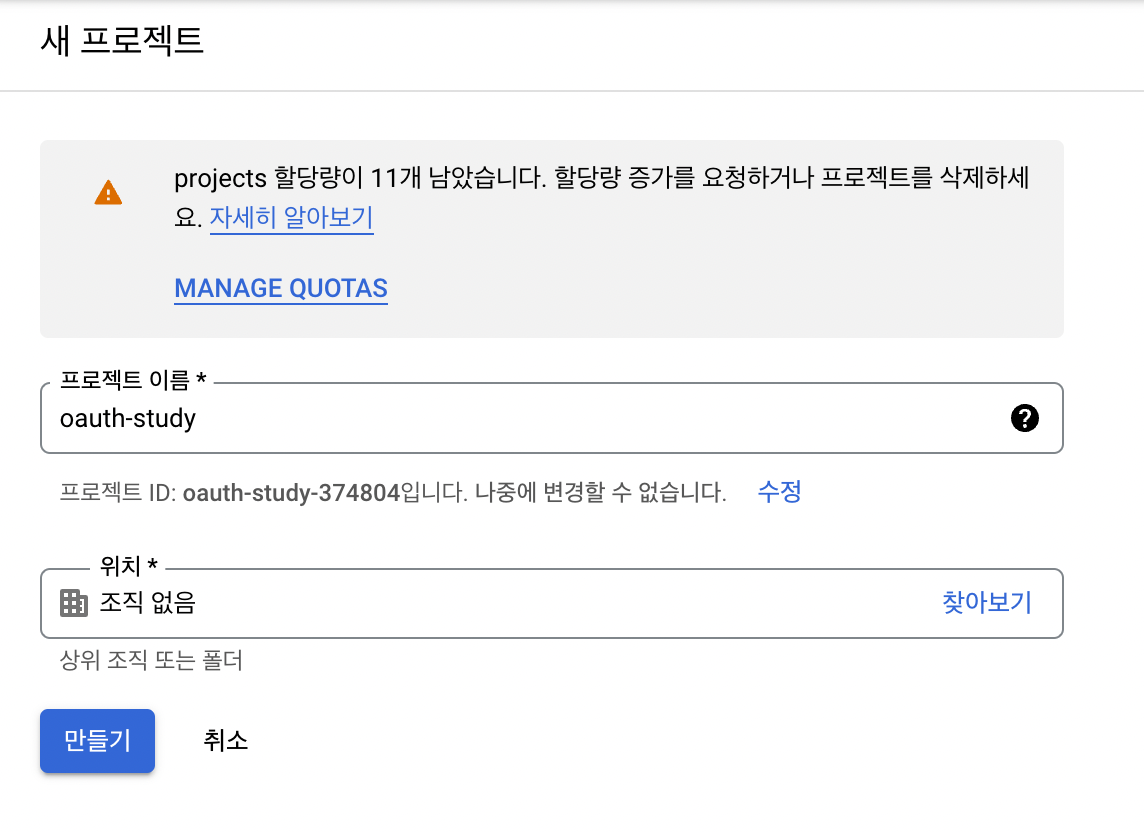
우선 Google Cloud에 접속해 프로젝트를 등록해야 합니다.
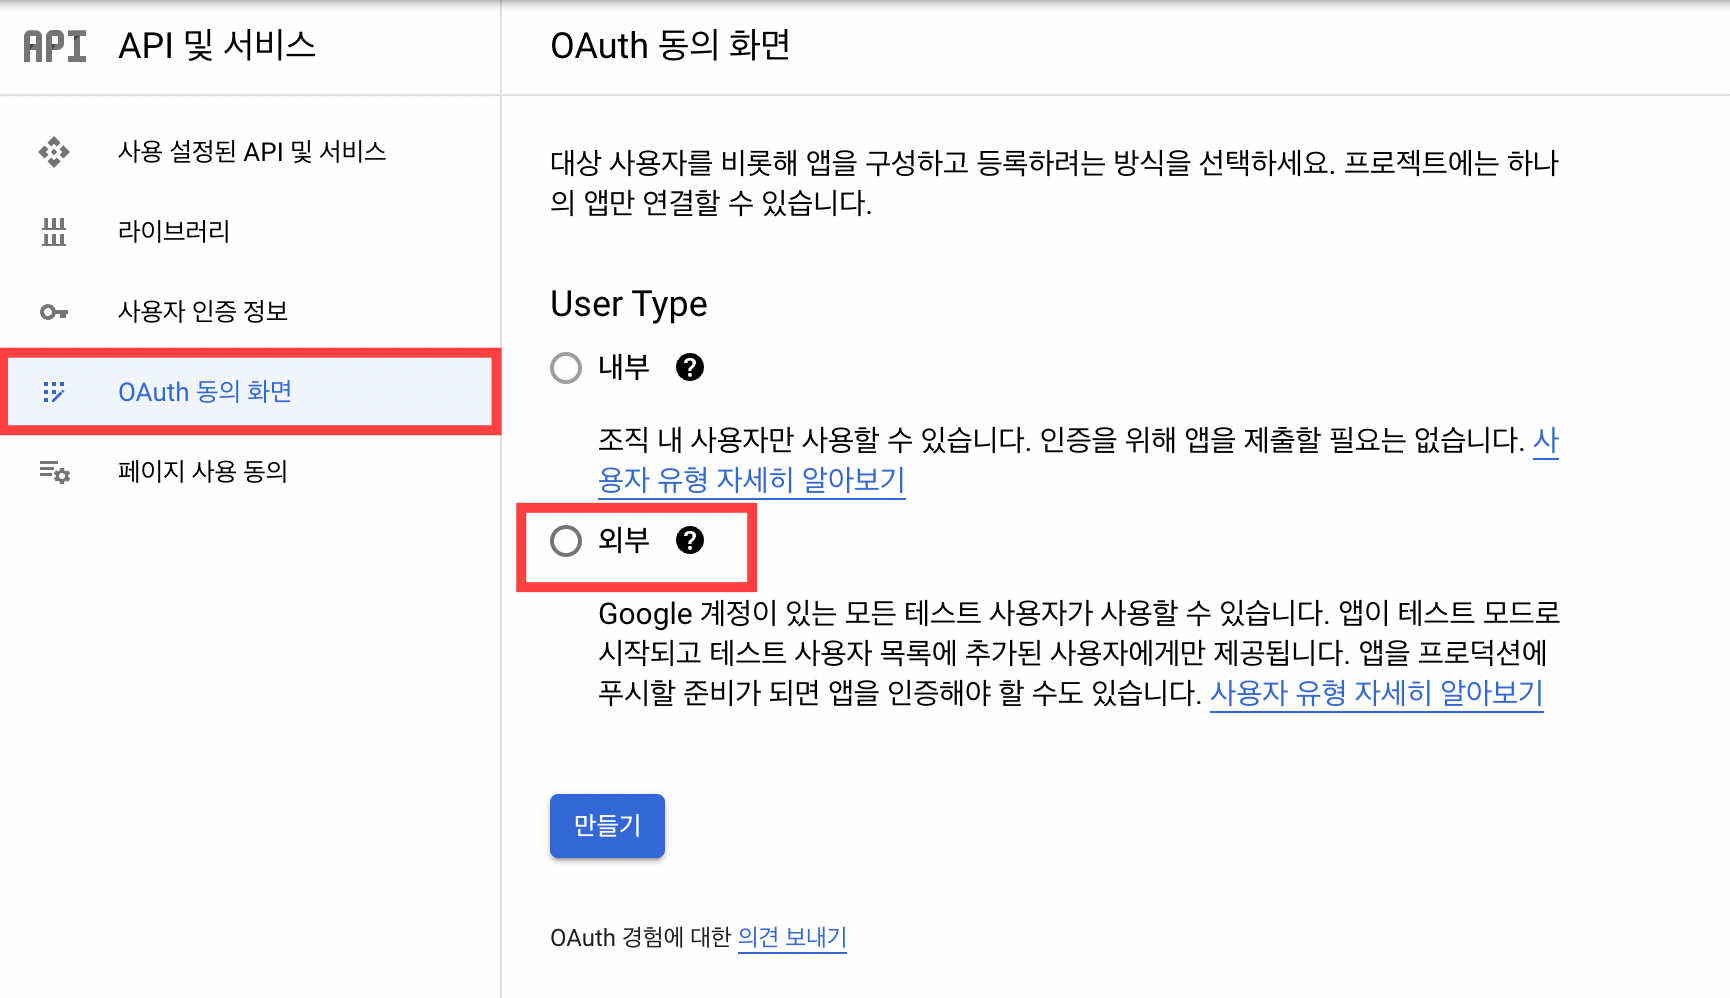
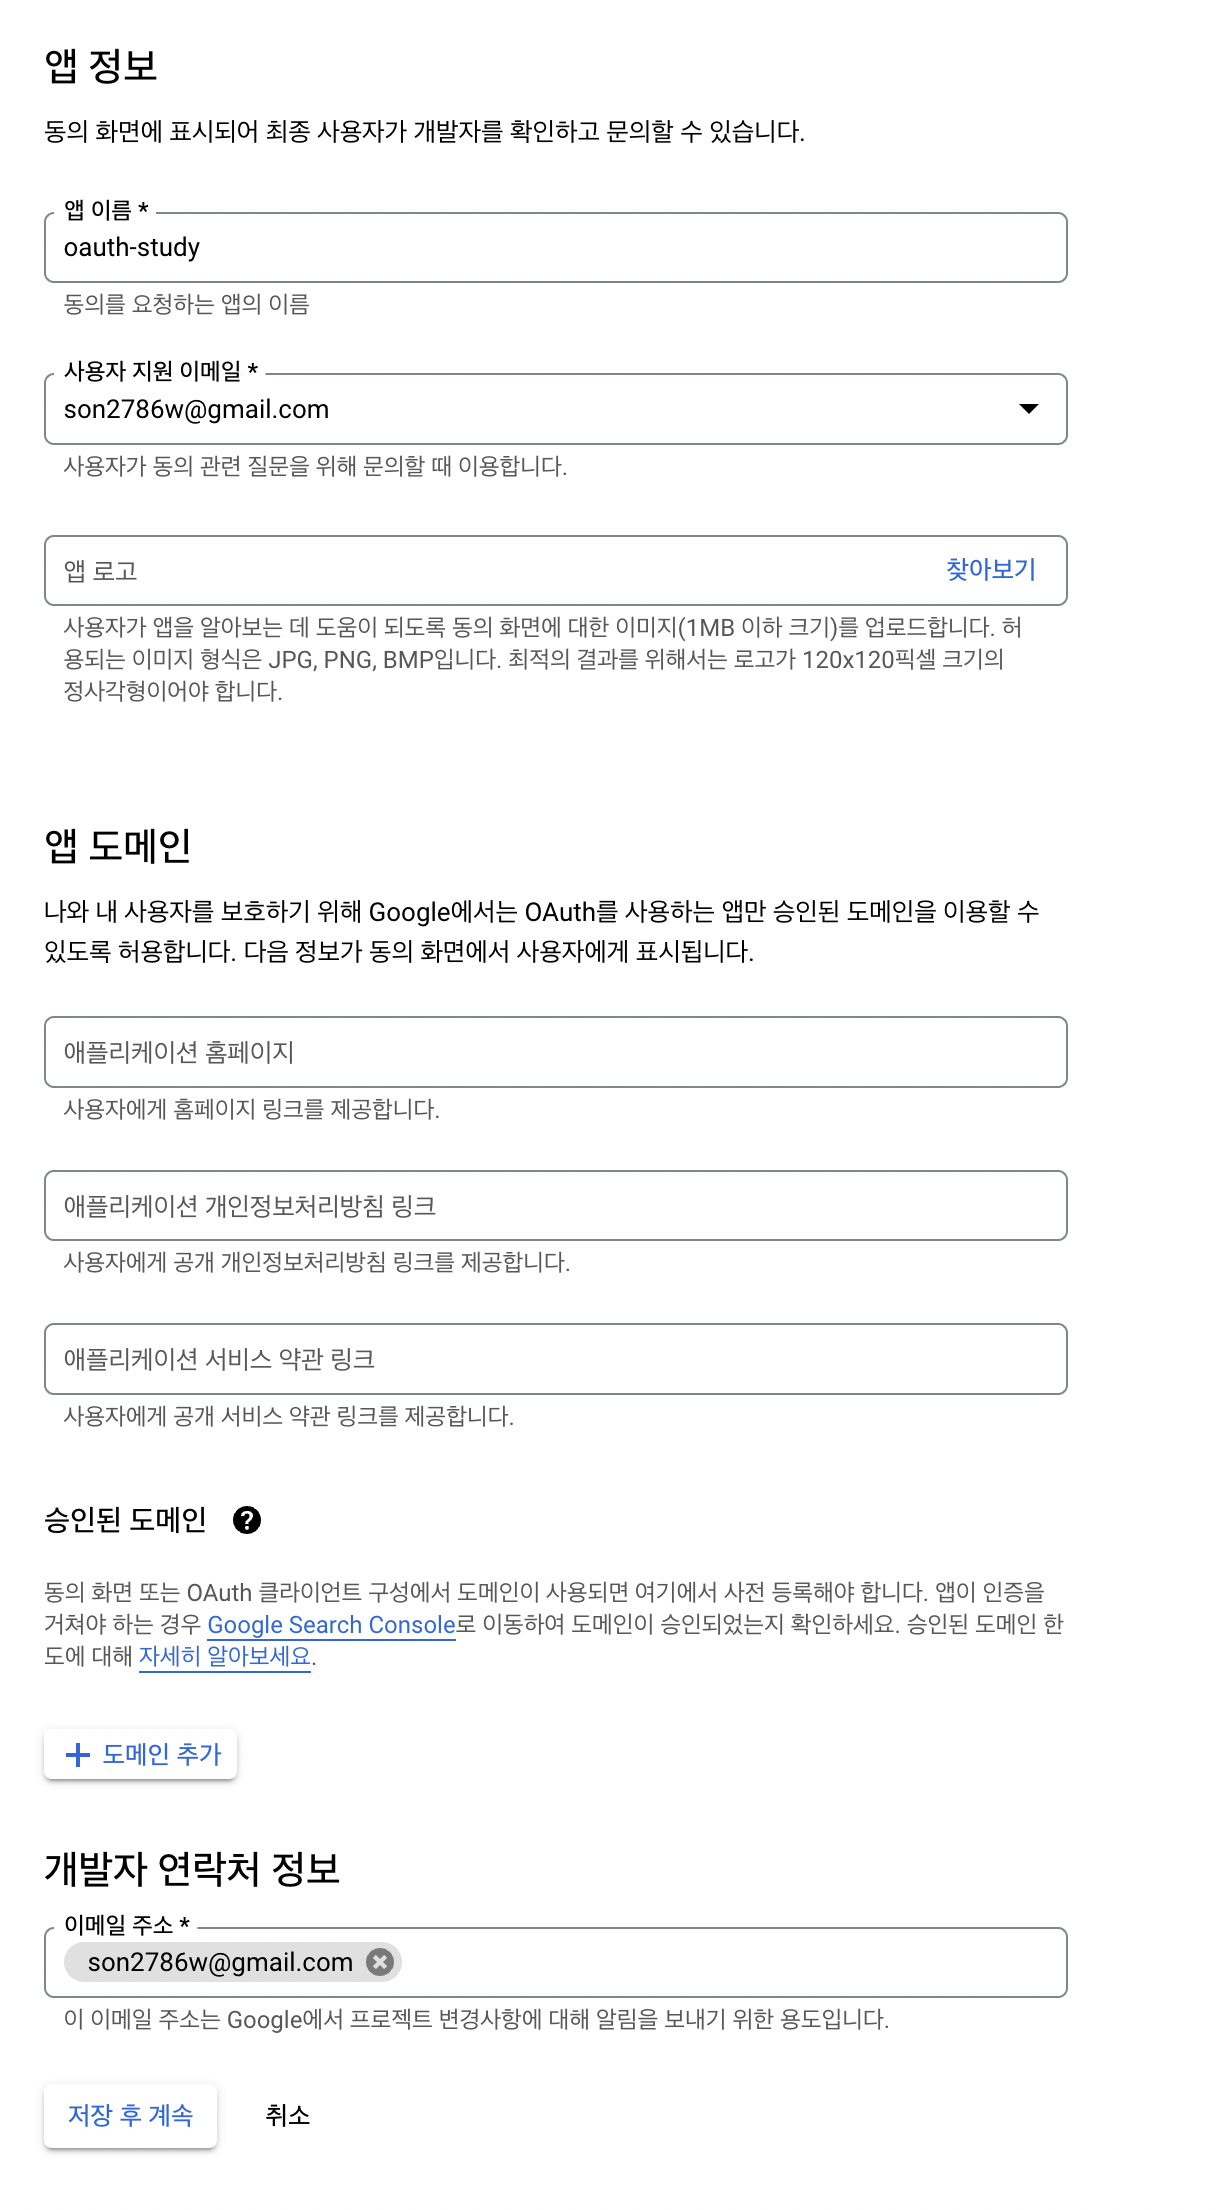
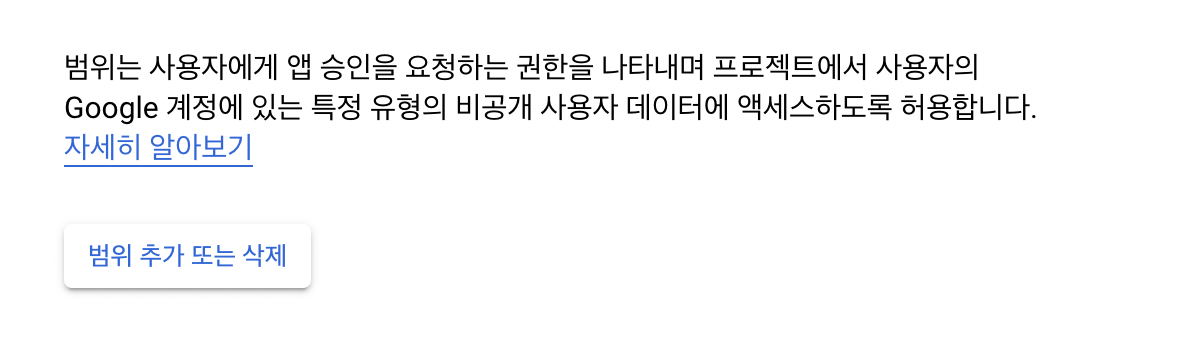
그리고 API 및 서비스를 선택해 OAuth 동의 화면으로 넘어가 아래 사진과 같이 입력합니다.
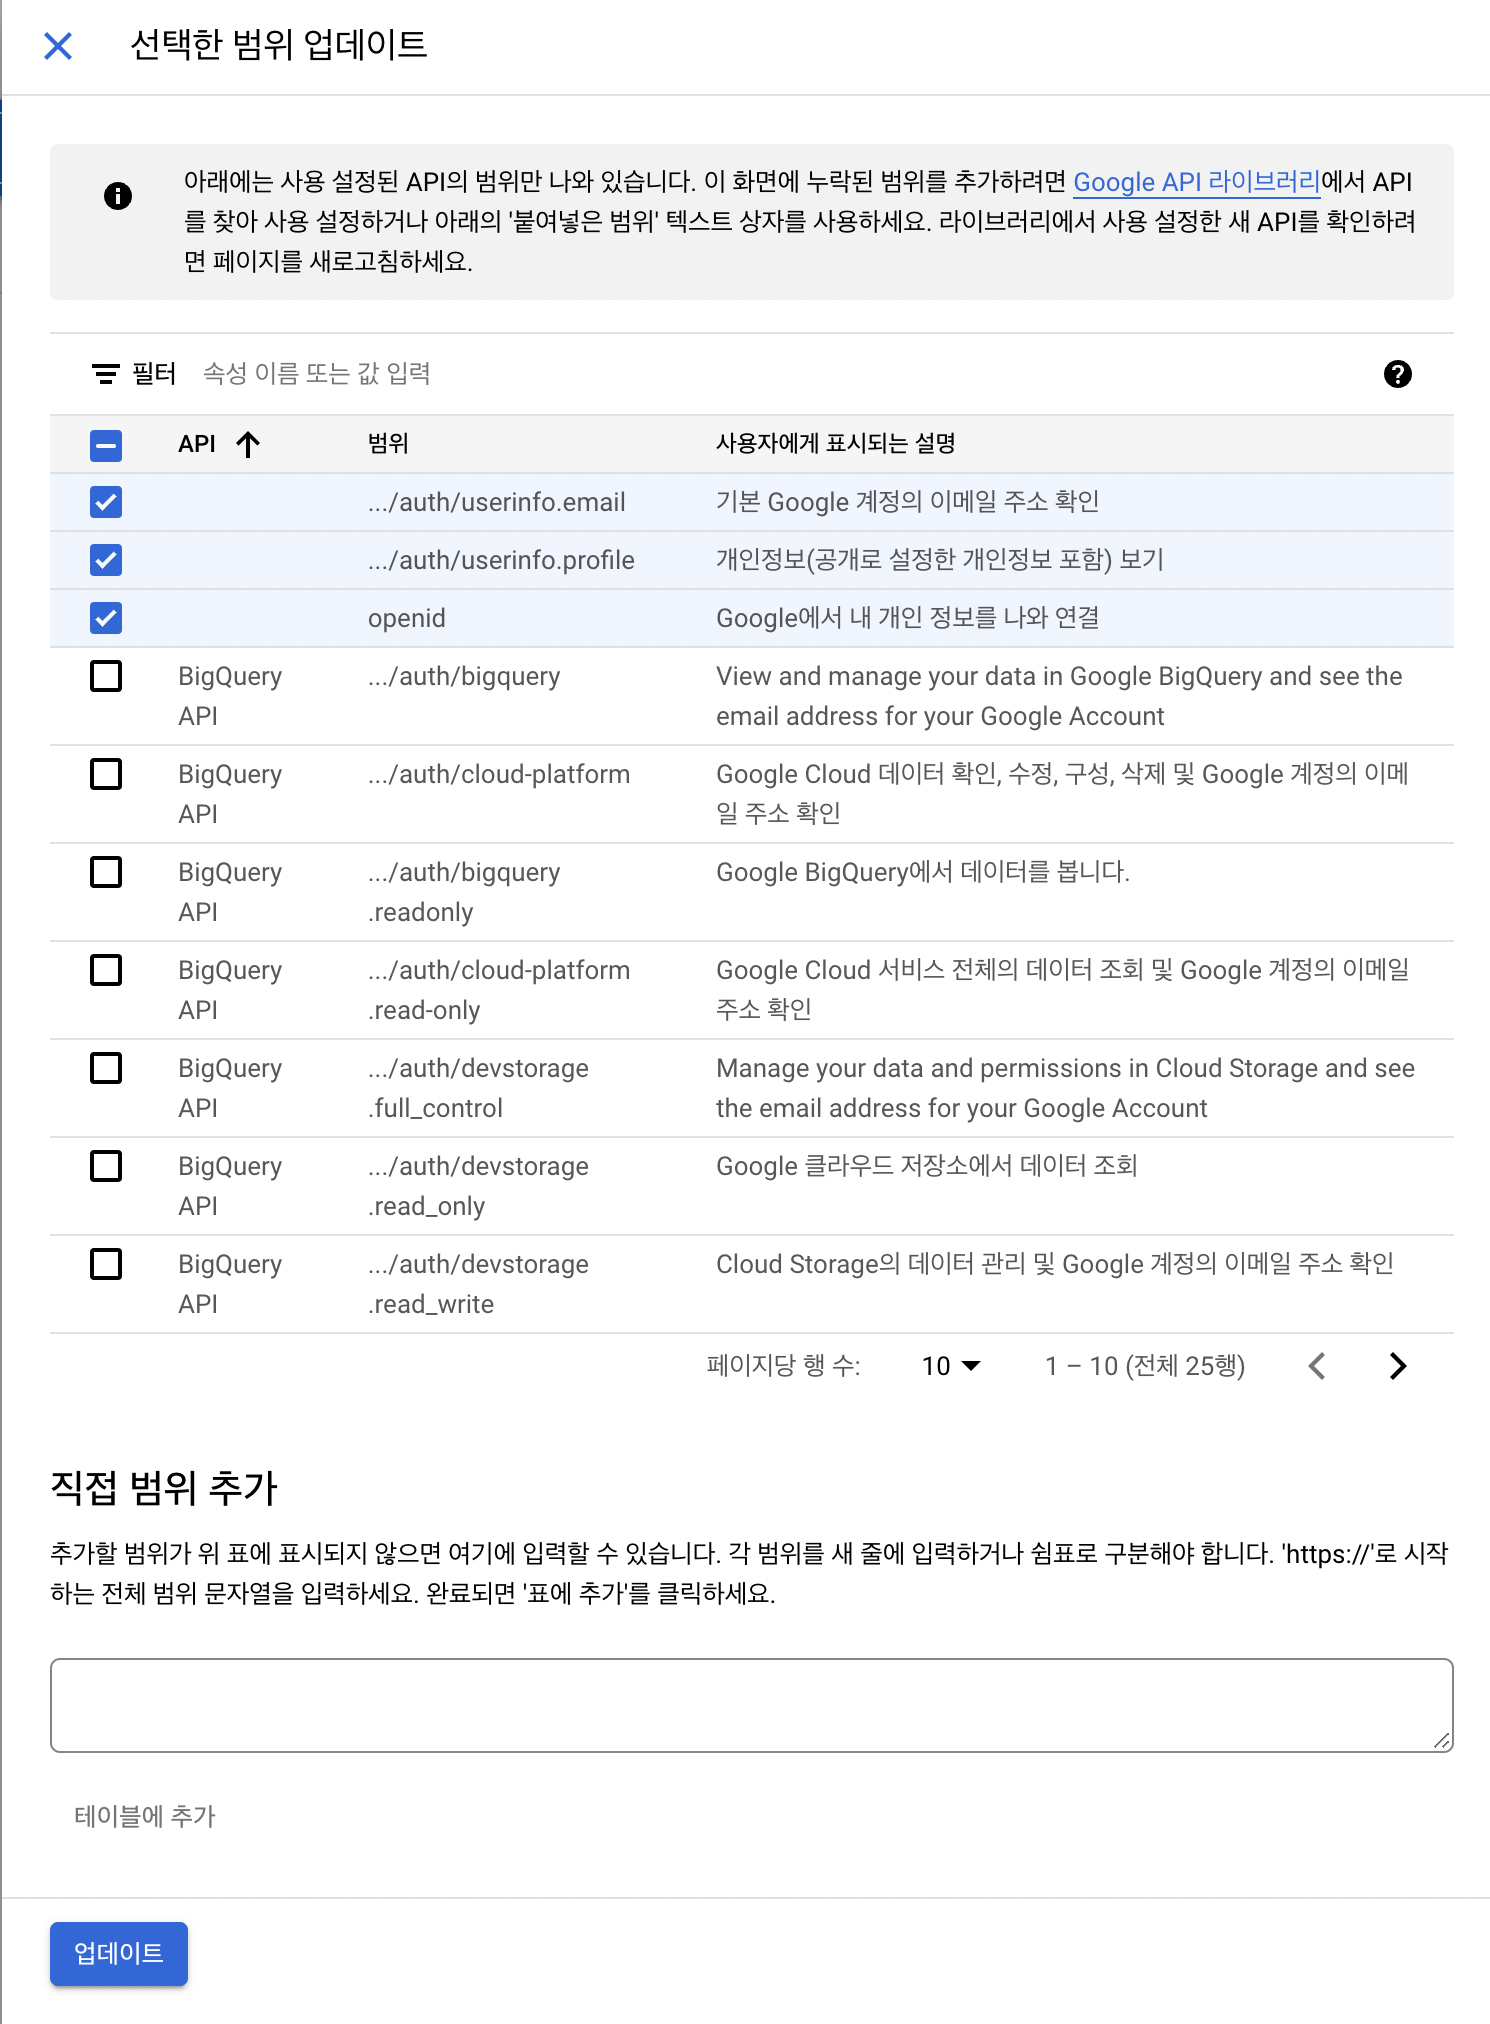
범위 추가 또는 삭제를 클릭해 어떤 데이터에 액세스할지 범위를 설정합니다.
그 다음 사용자 인증 정보를 만들기 위해 사용자 인증 정보 > 사용자 인증 정보 만들기 > OAuth 클라이언트 ID를 선택합니다.
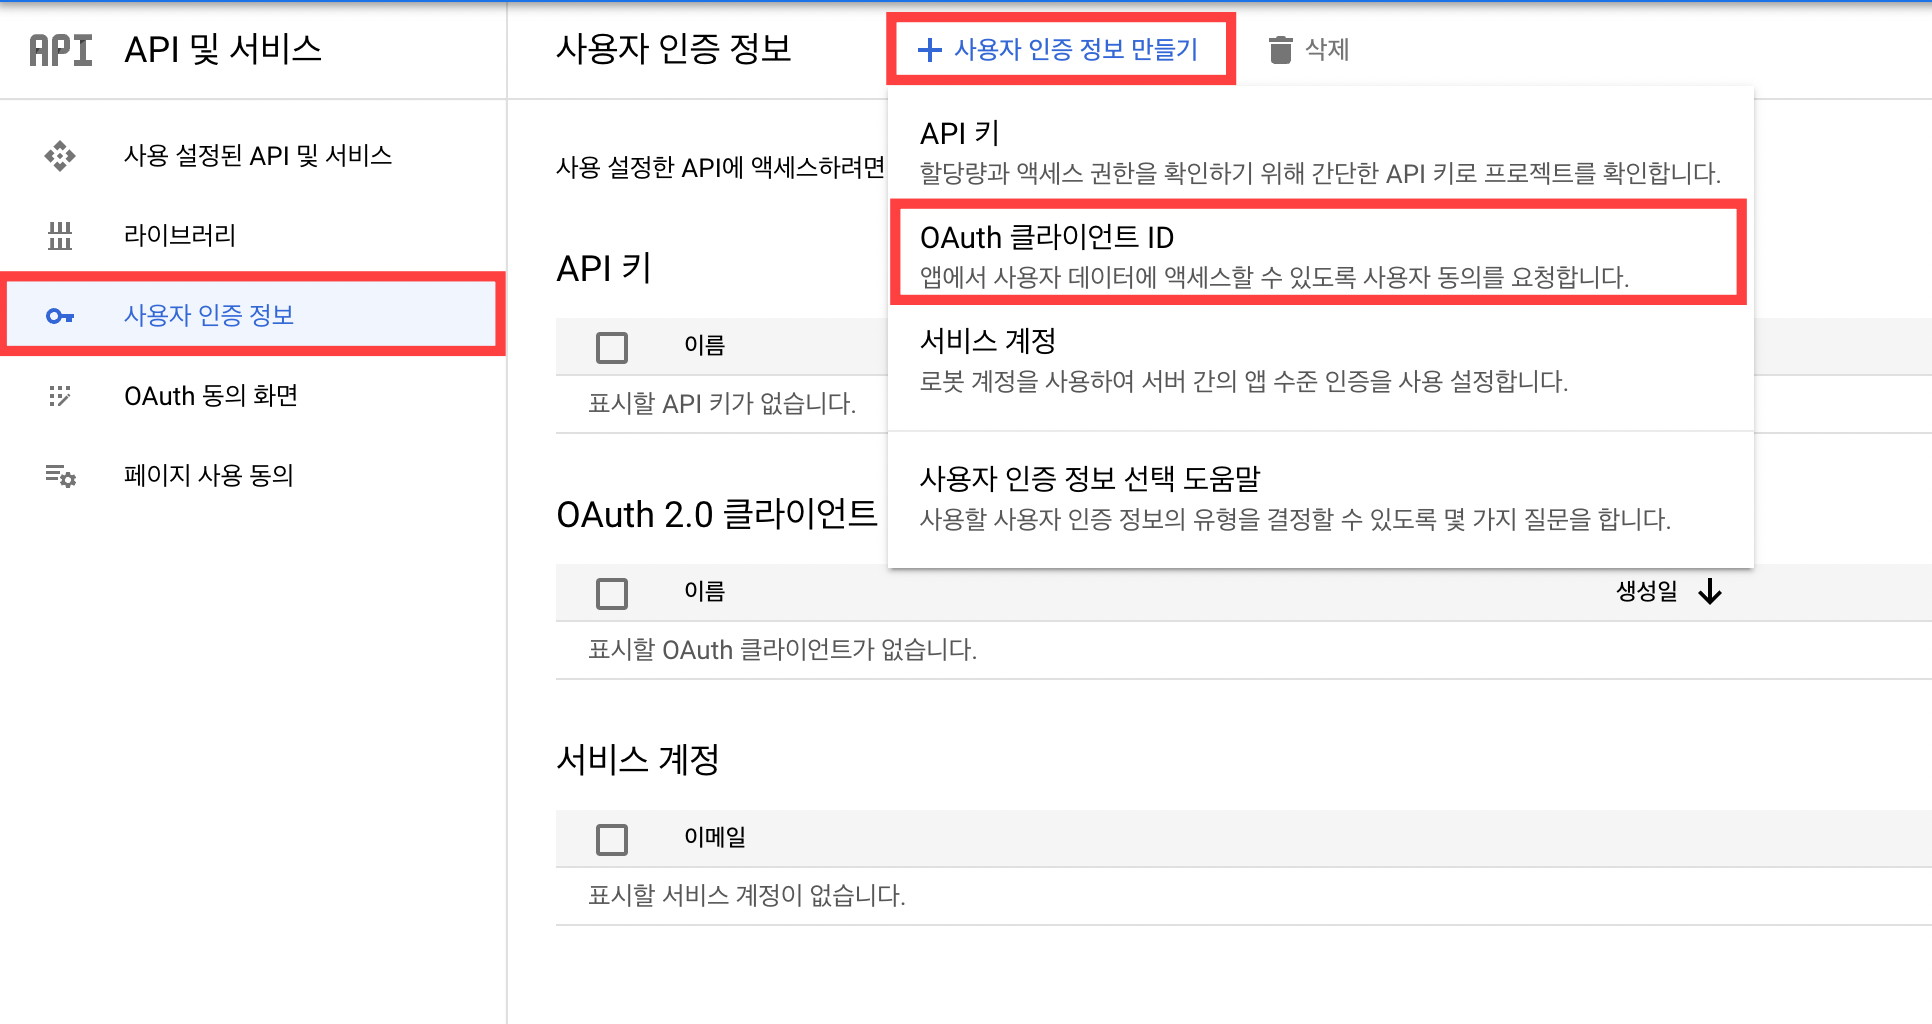
애플리케이션 유형, 이름, 리다이렉션 URI를 설정해줍니다.

그러면 다음과 같이 클라이언트 ID, 클라이언트 비밀번호를 얻을 수 있습니다.

이제 해당 값들을 이용해 인증하는 기능을 구현할 수 있습니다.
2. 인증 기능 구현하기
의존성 추가하기
implementation 'org.springframework.boot:spring-boot-starter-web'

// OAuth
implementation 'org.springframework.boot:spring-boot-starter-security'
implementation 'org.springframework.boot:spring-boot-starter-oauth2-client'

// Database
implementation 'org.springframework.boot:spring-boot-starter-data-jpa'
runtimeOnly 'mysql:mysql-connector-java'
properties 추가하기
application-oauth.properties 작성하기
spring.security.oauth2.client.registration.google.client-id=클라이언트id
spring.security.oauth2.client.registration.google.client-secret=클라이언트pw
spring.security.oauth2.client.registration.google.scope=profile,email
# scope의 기본값은 email, profile, openid
# 이 경우 네이버나 카카오와 같은 서비스에서 제공하는 OAuth의 경우 openID를 제공하기 않기 때문에 위와 같이 설정해 동일하게 적용 가능하도록 구현
application-oauth.properties를 application.properties에 추가하기
spring.profiles.include=oauth
gitignore에 application-oauth.properties 추가
application-oauth.properties
Role 만들기
우선 User의 역할 정보를 가지는 Enum을 만들어줍니다.
@Getter
@RequiredArgsConstructor
public enum Role {
    USER("ROLE_USER"),
    ADMIN("ROLE_ADMIN");

    private final String value;
}
Time Entity 만들기
그리고 해당 유저의 생성 시간과 수정 시간을 관리하는 Entity를 만들어줍니다.
@Getter
@MappedSuperclass
@EntityListeners(AuditingEntityListener.class)
public abstract class TimeEntity {

    @Column(name = "created_date")
    @CreatedDate
    private String createdDate;

    @Column(name = "modified_date")
    @LastModifiedDate
    private String modifiedDate;

    /* 해당 엔티티를 저장하기 이전에 실행 */
    @PrePersist
    public void onPrePersist(){
        this.createdDate = LocalDateTime.now().format(DateTimeFormatter.ofPattern("yyyy.MM.dd"));
        this.modifiedDate = this.createdDate;
    }

    /* 해당 엔티티를 업데이트 하기 이전에 실행*/
    @PreUpdate
    public void onPreUpdate(){
        this.modifiedDate = LocalDateTime.now().format(DateTimeFormatter.ofPattern("yyyy.MM.dd HH:mm"));
    }
}
User Entity 만들기
Time Entity를 상속받아 유저 정보를 가지고 있는 Entity를 만들어줍니다.
@Builder
@Getter
@Entity
@AllArgsConstructor
@NoArgsConstructor
public class User extends TimeEntity {

    @Id
    @GeneratedValue(strategy = GenerationType.IDENTITY)
    private Long id;

    @Column(nullable = false, length = 30, unique = true)
    private String username;

    @Column(nullable = false, unique = true)
    private String nickname;

    @Column(length = 100)
    private String password;

    @Column(nullable = false, length = 50)
    private String email;

    @Enumerated(EnumType.STRING)
    @Column(nullable = false)
    private Role role;

    public void modify(String nickname, String password) {
        this.nickname = nickname;
        this.password = password;
    }

    public User updateModifiedDate() {
        onPreUpdate();
        return this;
    }

    public String getRoleValue() {
        return this.role.getValue();
    }
}
User Repository 만들기
public interface UserRepository extends JpaRepository<User, Long> {
    Optional<User> findByUsername(String username);
}
OAuthAttributes
OAuth2UserService를 통해 가져온 OAuth2User의 attribute를 담을 클래스를 만들어줍니다.
@AllArgsConstructor
@NoArgsConstructor
@Builder
@Getter
public class OAuthAttributes {
    private Map<String, Object> attributes;
    private String nameAttributeKey;
    private String username;
    private String nickname;
    private String email;
    private Role role;

    public static OAuthAttributes of(String registrationId,
                                     String userNameAttributeName,
                                     Map<String, Object> attributes) {

         /* OAuth 서비스(구글 (ofGoogle)), 네이버(ofNaver), 카카오(ofKakao)) 구분하기 위한 메소드 */
        return ofGoogle(userNameAttributeName, attributes);
    }

    private static OAuthAttributes ofGoogle(String userNameAttributeName,
                                            Map<String, Object> attributes) {
        return OAuthAttributes.builder()
                .username((String) attributes.get("email"))
                .email((String) attributes.get("email"))
                .nickname((String) attributes.get("name"))
                .attributes(attributes)
                .nameAttributeKey(userNameAttributeName)
                .build();
    }

    public User toEntity() {
        return User.builder()
                .username(email)
                .email(email)
                .nickname(nickname)
                .role(Role.SOCIAL)
                .build();
    }
}
SessionUser
세션에 사용자 정보를 저장하기 위한 Dto 클래스를 만들어줍니다.
@Getter
public class SessionUser implements Serializable {
    private String name;
    private String email;

    public SessionUser(User user) {
        this.name = user.getNickname();
        this.email = user.getEmail();
    }
}
CustomOAuth2UserService
OAuth2의 처리 기능을 구현할 CustomOAuth2UserService를 만들어줍니다.
@RequiredArgsConstructor
@Service
public class CustomOAuth2UserService implements OAuth2UserService<OAuth2UserRequest, OAuth2User> {

    private final UserRepository userRepository;
    private final HttpSession session;

    @Override
    public OAuth2User loadUser(OAuth2UserRequest userRequest) throws OAuth2AuthenticationException {
        OAuth2UserService<OAuth2UserRequest, OAuth2User> delegate = new DefaultOAuth2UserService();
        OAuth2User oAuth2User = delegate.loadUser(userRequest);

        /* 서비스 id 구분코드 ( 구글, 카카오, 네이버 등 ) */
        String registrationId = userRequest.getClientRegistration().getRegistrationId();

        /* OAuth2 로그인 진행 키값 */
        String userNameAttributeName = userRequest.getClientRegistration().getProviderDetails()
                .getUserInfoEndpoint().getUserNameAttributeName();

        /* OAuth2UserService */
        OAuthAttributes attributes = OAuthAttributes.of(registrationId, userNameAttributeName, oAuth2User.getAttributes());

        User user = saveOrUpdate(attributes);

        /* 세션 정보를 저장하는 직렬화된 dto 클래스*/
        session.setAttribute("user", new SessionUser(user));

        return new DefaultOAuth2User(
                Collections.singleton(new SimpleGrantedAuthority(user.getRoleValue())),
                attributes.getAttributes(),
                attributes.getNameAttributeKey());
    }

    /* 기존 회원이 존재하면 수정날짜 정보만 업데이트 */
    private User saveOrUpdate(OAuthAttributes attributes) {
        User user = userRepository.findByUsername(attributes.getEmail())
                .map(User::updateModifiedDate)
                .orElse(attributes.toEntity());

        return userRepository.save(user);
    }
}
SecurityConfig 설정하기
WebSecurityConfigurerAdapter는 버전이 업그레이되면서 Deprecated 되었습니다. 따라서 아래 코드와 같이 filterChain을 이용해 Configuration을 설정합니다.
@RequiredArgsConstructor
@Configuration
@EnableWebSecurity
public class SecurityConfig{

    private final CustomOAuth2UserService customOAuth2UserService;

    @Bean
    public SecurityFilterChain filterChain(HttpSecurity http) throws Exception {
        http
                .csrf().disable()
                .headers().frameOptions().disable()
                .and()
                .authorizeRequests()
                .antMatchers("/", "/css/**", "/images/spring/**", "/js/**").permitAll()
                .antMatchers("/api/**").hasRole(Role.USER.name())
                .anyRequest().authenticated()
                .and()
                .logout()
                .logoutSuccessUrl("/")
                .and()
                .oauth2Login()
                .userInfoEndpoint()
                .userService(customOAuth2UserService);
        return http.build();
    }
}
프론트엔드 구현하기
테스트용으로 간단하게 구현하기 위해 Mustache로 간단하게 로그인 기능만 구현해보겠습니다.
의존성 추가하기
compileOnly 'org.springframework.boot:spring-boot-starter-mustache'
Web Page 구현하기 (Mustache)
<!DOCTYPE HTML>
<html>
    <head>
        <meta http-equiv="Content-Type" content="text/html; charset=UTF-8" />

        <link rel="stylesheet" href="https://cdn.jsdelivr.net/npm/bootstrap-icons@1.6.0/font/bootstrap-icons.css">
        <link rel="stylesheet" href="/css/app.css">
        <link rel="stylesheet" href="https://stackpath.bootstrapcdn.com/bootstrap/4.3.1/css/bootstrap.min.css">
    </head>
    <body>
        {{#user}}
            <span class="mx-3">Hello {{user}}</span>
            <a href="/logout" class="btn btn-outline-dark">Logout</a>
            <a href="/modify" class="btn btn-outline-dark bi bi-gear"></a>
        {{/user}}
        {{^user}}
            <a href="/oauth2/authorization/google" role="button" class="btn btn-outline-danger bi bi-google"> Google Login</a>
        {{/user}}
    </body>
</html>
Controller 구현하기
@Controller
@RequiredArgsConstructor
public class IndexController {

    private final HttpSession httpSession;

    @GetMapping("/")
    public String index(Model model) {
        SessionUser user = (SessionUser)httpSession.getAttribute("user");

        if(user != null) {
            model.addAttribute("user", user.getName());
        }

        return "index";
    }
}
결과
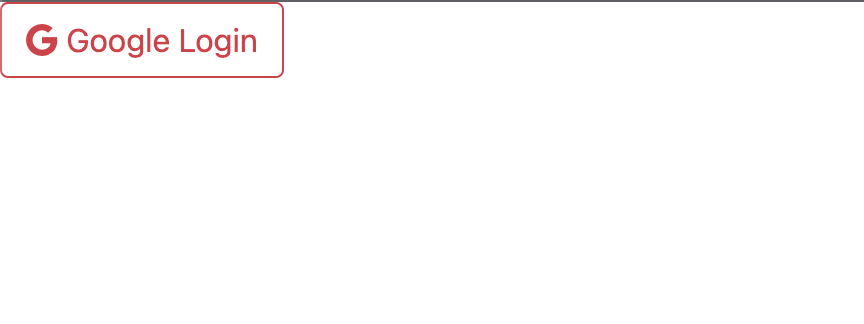
이제 http://localhost:8080에 접속하면 다음과 같이 Google Login 버튼이 나타나고 클릭합니다.
클릭시 구글 로그인 화면으로 이동하고 로그인시 아래 화면처럼 로그인 성공 화면으로 이동합니다.

댓글남기기